Running a node is increasingly becoming a viable way to carve out a space in the crypto market with minimal capital investment. In this article, Blockchain Bulletin Weekly will provide a detailed, step-by-step guide on how to Run 0G Labs Node, a cutting-edge Data Availability platform designed for AI.
Introduction to 0G Labs
0G Labs, also known as ZeroGravity, is a revolutionary Data Availability platform that offers a versatile data storage layer for both Web2 and Web3 environments. It caters to a variety of storage needs, including on-chain AI data. With its innovative concept, 0G Labs has successfully raised $35 million during its Pre-Seed round, led by Hack VC, with participation from prominent investment funds like Delphi Ventures, Animoca Brands, OKX Ventures, and more.
Types of Nodes you can run with 0G Labs
Currently, 0G Labs supports three types of nodes:
- Validator Node
- Storage Node
- Data Availability Node
In this guide, we’ll focus on how to Run 0G Labs Node specifically for the Storage Node type.
Phase 1: Preparation
Before you can run an 0G Labs node, you’ll need to prepare a few things:
- Hardware Requirements:
- CPU: 4 Cores
- RAM: 16 GB
- Disk Space: 500 GB NVMe
Make sure your PC or VPS meets these minimum hardware requirements to ensure smooth operation.
- Create a New EVM Wallet:
You’ll need a fresh EVM wallet address to receive faucet tokens from the 0G Testnet. This wallet will be used to operate your node.
Phase 2: Installation and setup
Step 1: Install Essential Software
Start by updating your system and installing the required packages:
sudo apt-get update
sudo apt-get install clang cmake build-essential pkg-config libssl-dev
These packages are necessary for building and running the node software.
Step 2: Install Rust
Rust is a systems programming language that is essential for running 0G Labs Node. Install it using the following command:
curl –proto ‘=https’ –tlsv1.2 -sSf https://sh.rustup.rs | sh
After installation, restart your terminal or system to ensure Rust is properly configured.
Step 3: Install Go
Next, install Go, another programming language required for the node setup:
wget https://go.dev/dl/go1.23.0.linux-amd64.tar.gz
sudo rm -rf /usr/local/go && sudo tar -C /usr/local -xzf go1.23.0.linux-amd64.tar.gz
export PATH=$PATH:/usr/local/go/bin
The export command updates your system’s PATH variable, making Go accessible from the terminal.
Step 4: Clone the 0G Storage Repository
To proceed with running the 0G Labs Node, you’ll need to download the latest version of the 0G Storage Node software.
git clone -b v0.4.6 https://github.com/0glabs/0g-storage-node.git
This command clones the necessary files into your system.
Step 5: Build the Necessary Resources
Navigate to the cloned directory and build the resources required to run the node:
cd 0g-storage-node
cargo build –release
This step compiles the source code, creating executables that will be used to run the node.
Step 6: Configure the Storage Node
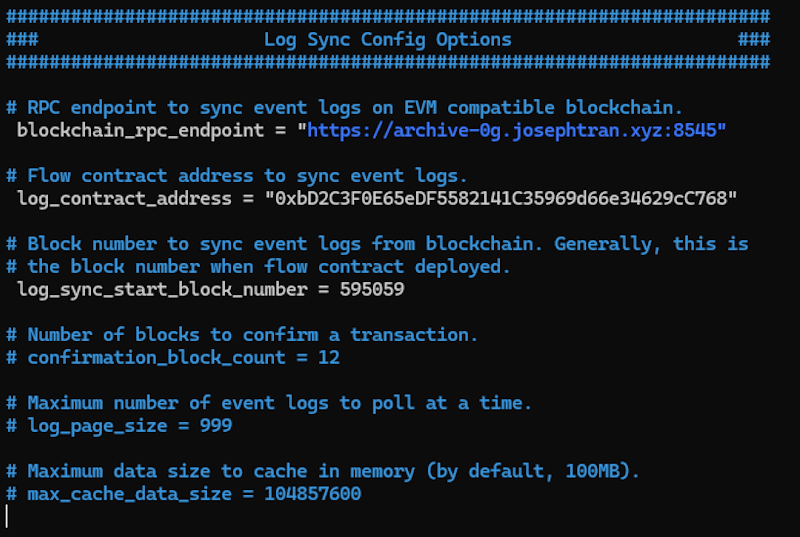
Now, it’s time to configure your node. Open the config.toml file for editing:
cd run
nano config.toml
Inside this file, you’ll need to make several critical changes:
- network_enr_address: Input your Public IP address within the quotes.
- network_boot_nodes: Replace the placeholder with the official node addresses provided by 0G Labs.
- blockchain_rpc_endpoint: Add the RPC endpoint, which could be your Public IP or any available RPC from the 0G Labs Discord.
- miner_key: Input the private key of your EVM wallet.
To save your changes, press CTRL + O, hit ENTER, and then exit with CTRL + X.
Step 7: Start the Storage Node
After configuring the file, you can start your Storage Node by running the following command:
../target/release/zgs_node –config config-testnet.toml –miner-key [Your Private Key] –blockchain-rpc-endpoint [Your RPC Endpoint] –db-max-num-chunks 1000000000
This command launches the Storage Node with the parameters you’ve set.
Step 8: Monitor Your Node
Once your node is running, you’ll want to monitor its activity. Use this command to view logs (replace the date with the current date):
tail -f ~/0g-storage-node/run/log/zgs.log.2024-09-02
This command will display real-time log updates, allowing you to monitor your node’s performance and troubleshoot any issues.
By following this detailed guide, you should now have a fully operational 0G Labs Node. Running a node can be a rewarding endeavor, providing both financial incentives and the opportunity to contribute to the growth of blockchain technology. If you encounter any challenges, the 0G Labs community and documentation are valuable resources for support. Happy node running!

